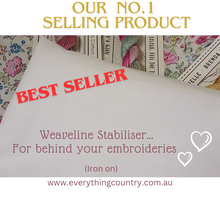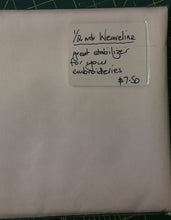
No.1 BEST SELLING ITEM !
This Weaveline is consistantly one of our Bestselling Items... and rightly so!! 👏👏
It is such a good product for using behind ALL of our embroideries as an excellent stabiliser. 😊👏
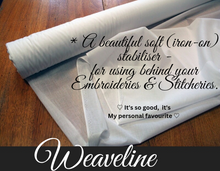
It is a beautiful soft stabiliser for using behind your embroideries and has a lovely luxurious feel to it.
It helps 'hold' the warp & weft of your embroidery fabric in place. (Each in their own 'correct' position - ...so you don't get any distortion, 'stretch' or puckering of your fabrics when you are embroidering on them.
It also helps in disguising threads that have been 'carried' across the back of your embroidery work (from one spot to another).
IT IS AN EXCELLENT PRODUCT!
Whilst still having a really lovely soft feel to it, the Weaveline makes your Linen lovely to hold when doing your embroideries... it is sooo good to work with and it is NOT stiff at all.
*This is my favourite stabiliser to use behind all of our embroideries*
If you are using our beautiful pigma pens to trace your embroideries with,... you would iron the creases out of your FABRIC first, then Trace your design onto your Linen Front (or chosen fabric)... and then you would IRON the fusible Weaveline stabiliser to the back of your Fabric. Never Iron directly on the stabiliser or you will get the melted product on your iron and your fabric.
** For more indepth directions on how to fuse (iron) your stabiliser to the back of your chosen fabric please read through my helpful TIPS below.
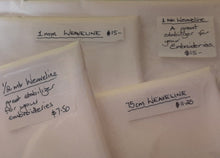
Our Weaveline has a usable area of 112cm wide.
............................................................................
Directions for using... (please read through to the end BEFORE ironing the stabiliser on).
How to Iron WEAVELINE STABILISER onto the back of your fabric-
1. Iron your FABRIC first so that it has no creases in it at all. (Note- The Embroidery Fabric gets ironed, NOT the stabiliser!!)
2. Trace your chosen embroidery design onto the front of your embroidery fabric with your Pigma Pen (or Uni Pin) ...
Then, once all of your embroidery design is fully traced onto the front of the fabric - ... (iron it again IF NECESSARY to get any final creases out of it).
3. Cut your weavelive so it is approx 1/2 " less than the measurements of your Embroidery fabric... so that when you "centre" the stabiliser behind it, you will have an approximate 1/4" clearance all the way around it (on the back of the fabric).
*With the WRONG SIDES of the fabric & the wrong side of the stabiliser facing together (ie the 'sticky'/granular side of the stabiliser facing the BACK OF THE FABRIC).
**Iron the FRONT OF YOUR FABRIC (with the stabiliser being behind it). The weavelive is centred on the back of your FABRIC, ... Remember, it will have a 1/4" clearance all the way around it.
With the FRONT of your embroidery design facing up AT YOU... Iron the front of your FABRIC with a hot Iron on the high steam setting ... (what you are doing is melting the glue product - to make the stabiliser stick to the back of your embroidery fabric). It must be hot & steamy (ie full of water) to ensure the 'glue' does melt and adhere properly to the back of the fabric.
* Make sure there are no little bits of stabiliser sticking out from the edges of your fabric... or you will have a sticky black residue ... melted on your iron OR on your fabric (definitely something to avoid !)
*Use your iron (with water in it) on a high steam setting (so it melts the little gluey/grainy bits... thus adhering to THE BACK of your chosen fabric) really well.
*Becareful not to get the above wrong or you'll have sticky black glue all over your iron... and probably on your beautiful project too!!
*(I do sell quality Applique Mats that help stop this happening too.)
Pigma Pens- *MY preferred method of 'tracing' the designs onto the embroidery fabric is with a Pigma Pen... (now also known as a Uni Pin) these can be found on my site too... and are highly recommended. They are a permanent, non acidic, non yellowing, non bleeding fine permanent marker that IS of archival quality, and IS intended to be used on fabric. We've been using them for nearly 20 years now... and they DO NOT BLEED OR RUN DYE ON YOUR FABRIC!!! ❣️👏👏👏 like other 'pens' can...
If you have any questions at all, don't hesitate to ask. I'm happy to help.
HAPPY STITCHING to you ♡
If you would like to learn all the ins and outs of embroidery, ask about joining one of our monthly embroidery classes... There are so many beautiful stitches (and techniques) to learn. 💖
Happy Stitching.
Kind Regards,
Debbie 🌺
CLASSES ARE AVAILABLE IN ROOM & ONLINE. PLEASE CONTACT ME FOR FULL DETAILS.


